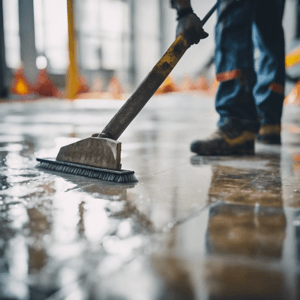
Tar and glue removal - Method Statement

This method statement for removing tar and glue is available as an instant download.
At the top of the first page, you can enter your company name and project details, and at the bottom, you can sign, print, and date it.
It couldn’t be easier. Once you’ve entered your details, you’re good to go.
You can customise the document to your needs by inserting your company name, logo, contact details, site address, etc.…
The method statement becomes part of your branded H&S package.
To use tar and glue remover effectively, start by ensuring that the surface is clean and free of loose dirt and debris. This initial preparation helps the remover to work more efficiently.
Next, apply the tar and glue remover directly to the affected area. Use either a microfiber cloth or a trigger spray bottle for even distribution. Apply a generous but controlled amount to ensure the residue is adequately saturated.
Allow the remover to sit on the surface for several minutes, typically between 5 to 10 minutes, to soften the tar and glue residue. During this time, the active ingredients in the remover will penetrate and break down the adhesive bonds.
After the waiting period, gently wipe away the softened residue with a clean microfiber cloth. Apply light pressure to avoid scratching the surface. If the residue does not come off easily, repeat the application process—apply more remover, allow it to sit again, and then wipe.
When working on interior surfaces, gently agitate the area using the microfiber cloth in a circular motion. This can help further break down the contaminant for easier removal.
Once most of the residue has been removed, ensure that any excess remover is wiped off using a fresh microfiber cloth. This step prevents any remaining product from staining or reacting with other treatments.
Finally, rinse the area with clean water to remove any leftover product from the tar and glue remover. Thorough rinsing ensures the surface is free of chemicals that might interfere with future treatments.
Make sure the area is completely dry before proceeding with waxing, sealing, or applying any other treatments. This drying phase is crucial for achieving optimal adhesion and a smooth finish.
For safety, always work in a well-ventilated area to minimise inhalation of vapours, and wear protective gloves to prevent skin irritation. Additionally, test the tar and glue remover in a small, inconspicuous area first to ensure compatibility with the surface material. Following these steps will ensure a successful and safe cleaning process.
The method statement is:
- Recognised by local authorities
- Recognised by principal contractors
- Suitable for CDM sites
- Approved by H&S managers
It increases your chance of winning tenders and has been written by trained health and safety professionals.
If the method statement needs altering to include an additional task, such as:
“Ensure you sign and date the site register located in the welfare facilities before commencing work”
It can easily be added as the document comes in Word™, not PDF.
Once you buy and download this document, it’s yours for life to use repeatedly.
We’ve done the hard work for you, allowing you to inspire confidence in your company and your products and services.
The scope of work that this method statement covers includes:
- Start of works
- Removing tar and glue
- Finishing
Why not browse the HSEDocs catalogue of method statements, risk assessments, COSHH assessments, or industry-specific packages?
And for safety training relevant to your job, visit our online training courses.
GET THIS DOCUMENT
£8.99+VAT
- Available in Word™
- Fully customisable
- Add your Company Logo
- UK & EU Compliant

 CART
CART 